
Welcome to our first official DIY Tuesday! If you don’t know what I’m talking about, read this about some blog changes and a new schedule.
Last week I was supposed to have jury duty, but I got excused early and took advantage of being downtown to hit the LA Flower Mart. If you’re in the area and have never been, or if you’re planning your wedding, I HIGHLY recommend going. It costs $2 to get in if you aren’t a vendor, a small price for all of the bargains and floral inspiration (just remember that if you’re there in the summer, but your wedding is in the fall or winter you may not have the same floral options depending on what’s in season). I’ve got a post coming up soon about seasonal florals, so stay tuned.
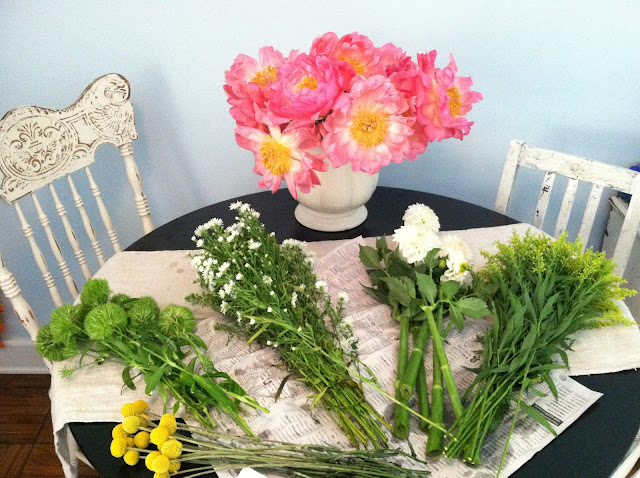
I found these gorgeous coral peonies, opened wide showing the yellow inside. I had to have them. And because the were opened up and would only last a couple of days, I got them for a steal! Since the peonies were going to be the focus of my bouquet, I selected a variety of other flowers in yellow, green, and white. Some were flowers I knew, and others were new to me. I don’t know a lot about flowers, so I was just picking what appealed to me and what I thought looked pretty together. After I was done, I had spent $30 for a huge group of peonies, two bunches of crespedia (fondly known as billy buttons), a big bunch of white dahlias, and three other types of florals that I don’t know the official names of (if anyone out there does, please educate me in the comments). They basically filled the passenger side of my car! When I got them home I put them all in water and laid out my materials.

Let me preface this DIY by saying that I have never done this before, and I’ve never taken a floral design class. So if I can do it, YOU can do it!
{Materials}
Variety of Flowers
Scissors or pruning shears
Jute or string
Containers of your choosing
Optional: I wrapped mine in a vintage hanky
{Step 1} Lay your flowers out on newspaper grouped by type
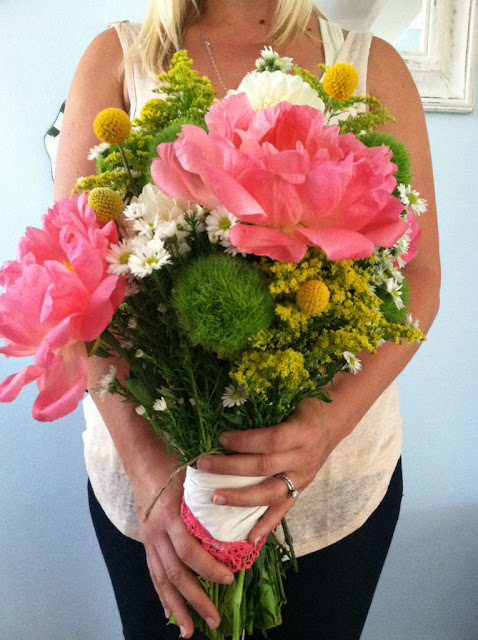
{Step 2} Start by gathering a little of each type of floral, and then keep adding bit by bit, keeping the big peonies and dahlias seperated by the daisies and yellow filler. Once I did this, I added a couple billy buttons and the green ball thingys.


{Bonus centerpiece and boutonniere}
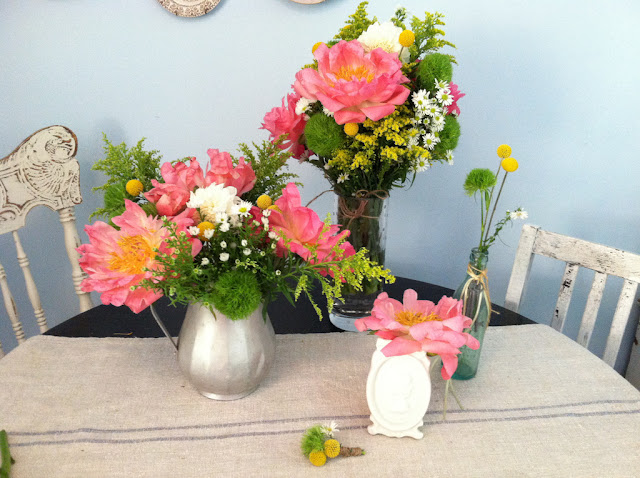
I had so much left over from my bouquet, that I wanted to make a quick centerpiece and boutonniere too, just to show you how much you can do with the $30 of flowers I bought.
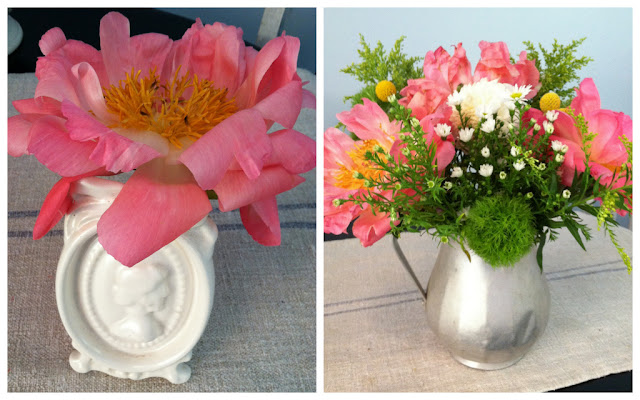
First I trimmed a single peony to size for the container I wanted to use. I love the look of a single peony on a table, either grouped with other smaller floral containers or alone. Next I selected a medium sized container, and basically went step by step like I did for the bouquet above to make the centerpiece below on the right. But because I wanted it to be looser and relaxed, I used less flowers.


Awesome DIY Inspiration! See you really can do your own wedding flowers! Those look great! Showing my DIY brides!
I’m not sure how I missed it … you make arranging look so easy! It never seems to come so easily to me, but I may give it another go. Maybe if you take me along to your next Flower Market trip your skills will rub off on me, haha!