

If you know Calvin, either in real life or from my IG feed, you know garbage trucks are his favorite thing in life. And you also know he’s had a rough couple of months with a health scare and physical therapy for his toe walking. He also hasn’t had a birthday party since he turned one, and last year we were in the process of a cross country move and weren’t even in our house yet on his birthday. So I thought he deserved a super special garbage truck birthday party at our home and I was determined to make it as awesome as he is. (more…)
kids parties
Quincy’s Cheery First Birthday

The difference between a first baby’s 1st birthday party and a third baby’s 1st birthday party is the obsessing over the planning and details. For Charlie’s, I started planning months in advance, making countless DIY projects and decorations. Since I was really busy and somewhat in denial that Quincy was turning 1, I didn’t even think about his first birthday party until the month of his birthday. And the only thing I made myself was his smash cake and the party cupcakes. Every other bit of decor came from the Target dollar spot, except for a super cute paper chain that big brother Charlie made the morning of the party. I wanted to share to show you that simple parties can be just as sweet and cute as elaborately planned ones. And honestly, I was able to enjoy Quincy’s party much more than any other birthday party I’ve thrown for my kids. Because I just didn’t overdo it or stress about it. (more…)
Party Planning Tips
 After planning five kids’ birthday parties over the last four years, I feel like I finally have a party planning system down. Calvin’s recent first birthday party was the easiest and most enjoyable one I have thrown yet (compared with Charlie’s first birthday party which almost drove me insane) so I thought I would share some tips for how I plan a party.
1. Decide on a theme.
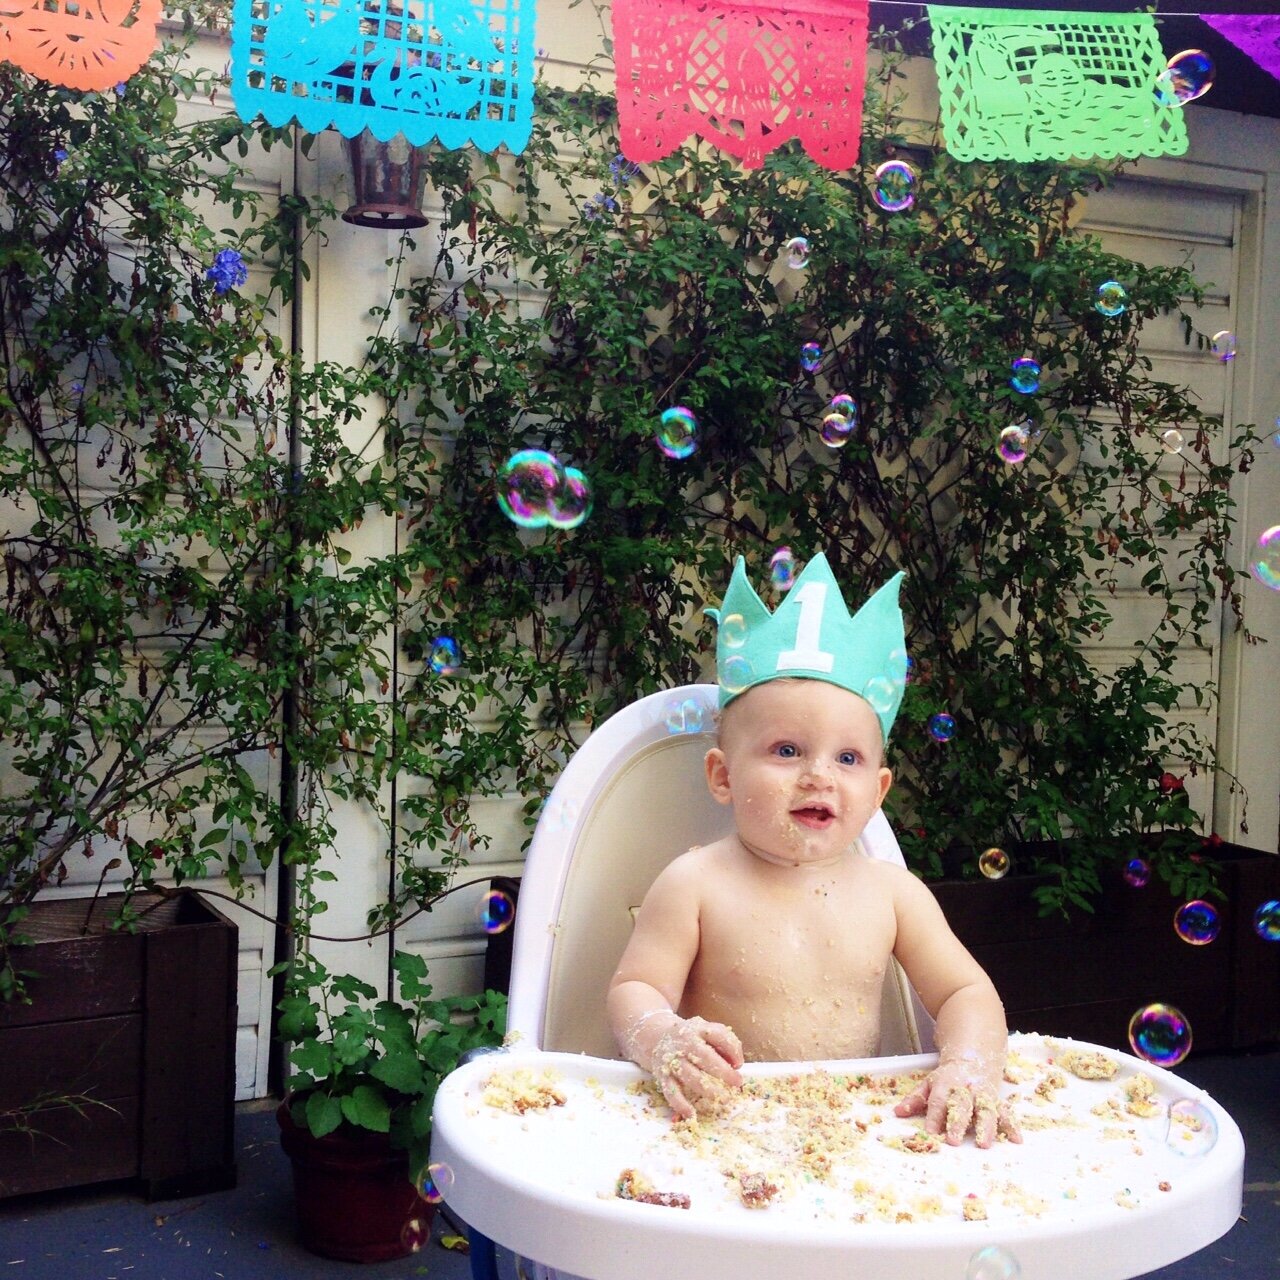
Choosing a party theme or overall vision is the most important decision you’ll make when party planning. A theme can make a party overly complicated or super simple. Or maybe you decide no theme is the best theme, which is totally great too but is sometimes hard for me to nail down cohesive details if I don’t at least have a vision. I’ve found two themes that have been really simple to coordinate both details and food served: a circus/carnival theme and a Mexican fiesta theme.
2. Jot down a list of ideas.
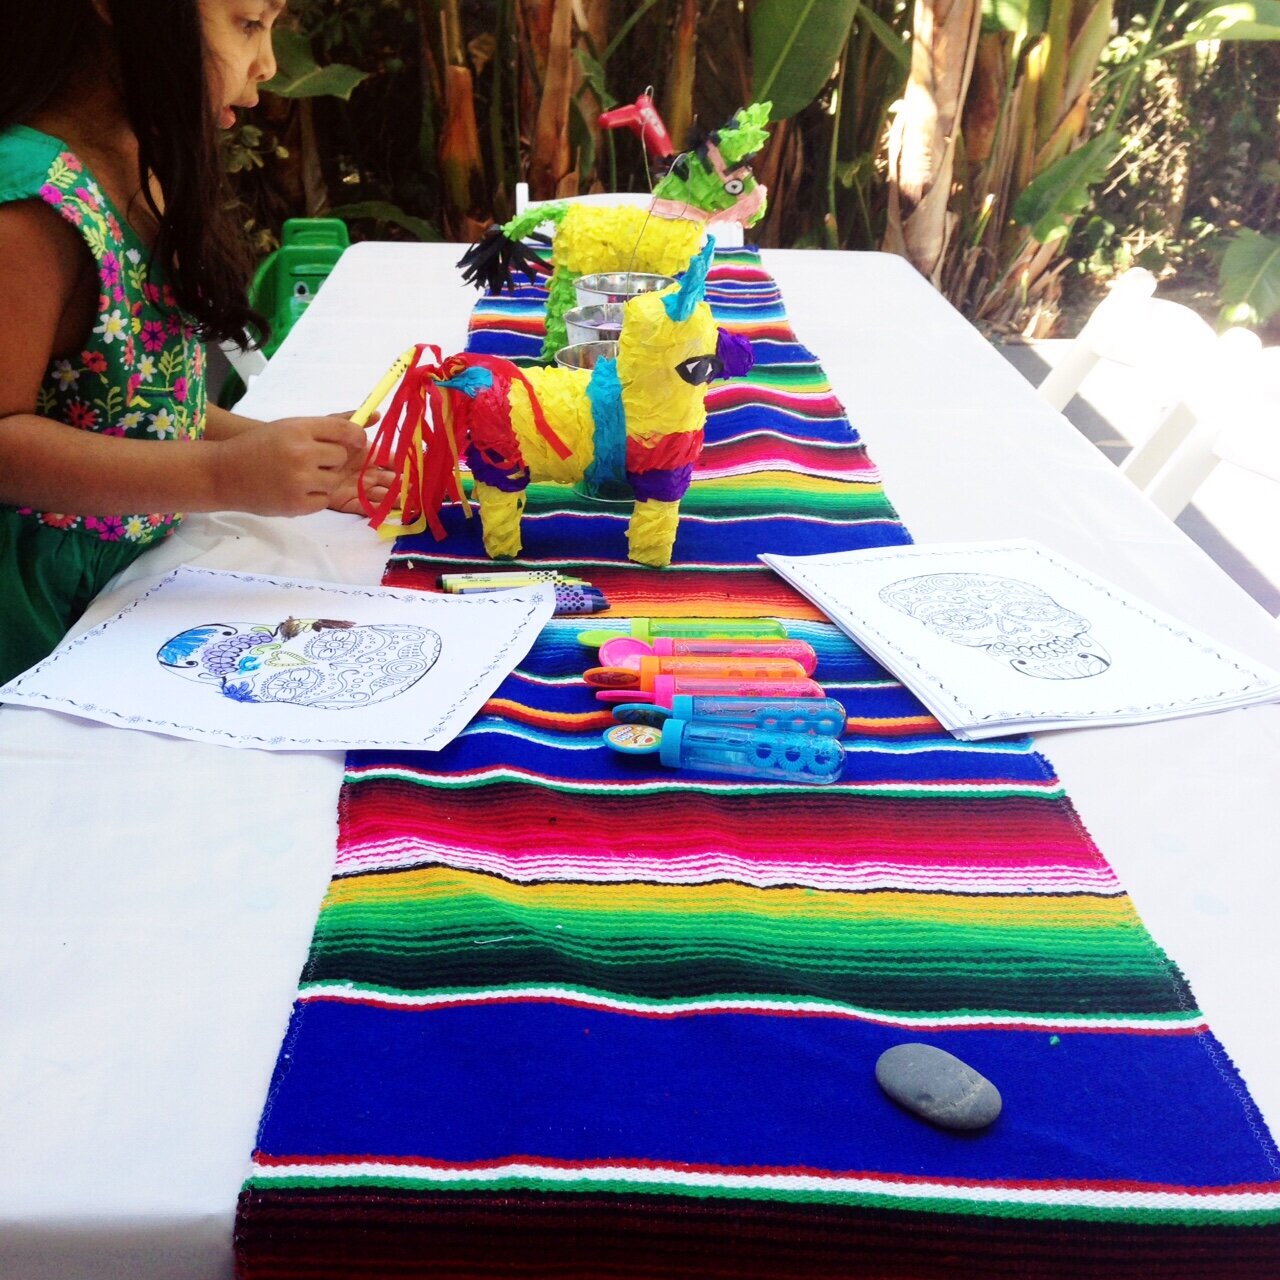
Once you decide on a theme, jot down your list of initial ideas. Not only will you not do them all — you should not do them all. This is just a starting point. My initial list of ideas for Calvin’s first birthday fiesta looked like this: Mexican food, piñatas, cacti details, color, serape blankets, papel a picado, paletas from Si Paletas, margaritas/ Mexican beer for adults, Mexican sodas, churros, maracas w/ gracias tags for favors, succulents. Eventually I scrapped the margs and churros in favor of just beer and homemade cupcakes for the kids (plus a giant cupcake for a smash cake), and our caterer provided soda and water, so we decided against Mexican sodas as well. A field trip to the party district in Downtown LA provided serapes, papel a picado flags, maracas, and a big piñata on the cheap — making it easy to execute the decor ideas without spending a fortune. Anything that we didn’t find or that didn’t end up being included easily got taken off the list.

3. Get online to narrow down ideas, book vendors, shop around for details & more.
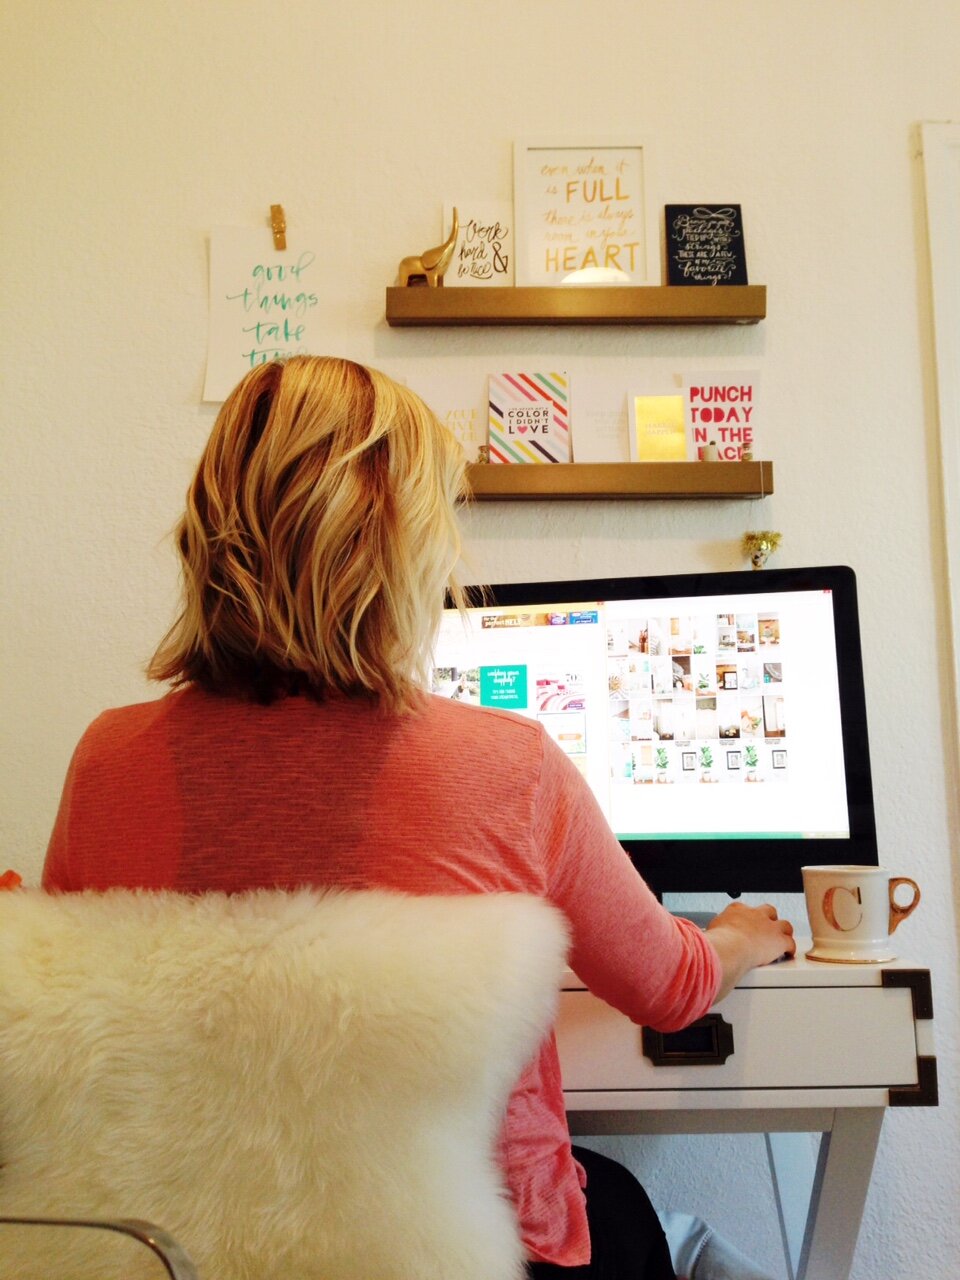
Your best friend when party planning is your computer. From getting ideas and inspiration to creating a Pinterest board of party ideas, to shopping around for decor, to sending out online invitations or designing paper invitations — almost all of the planning happens on the computer.
My Intel All in One played a big role in my party planning this time around. From planning to execution I used my computer for everything. I compared catering prices, found table rentals, bought the perfect details, located local party supply shops, sent out invitations, downloaded theme-specific coloring pages, and even bought our outfits online, and thanks to the huge screen and easy-to-use features (like a touch screen!), the All in One made everything more streamlined and efficient. I’m even using it to design my thank you cards and share photos from the party with guests, and then later here on my blog.
4. Keep it simple and spend money on things that make your life easier.
You may be tempted to do include every single idea you have into your party. Don’t. If I have learned one big lesson from party planning it is keep it simple. It will make the details you do choose more noticeable, it will keep you sane, and kids barely notice anyways. This last party was more simple and laid back and because we hired an outside food vendor to cater to our guests (which was way easier than making everything ourselves and cheaper than picking up catered food to go from someplace like Chipotle) we didn’t have to set up, prepare, or clean up anything food related. It was amazing! Totally worth the money to get to enjoy the party ourselves.

5. Make sure there is a little something for everyone.
When having a party you really should try to find a way for kids of all ages (who will be attending) to be entertained, so that parents can enjoy themselves as well. For example, although Calvin’s party was a 1st birthday there were going to be several 4-5 year olds attending (big brother and his playgroup friends). So we had a small bounce house for energetic ones and put out coloring pages and crayons at the kids’ table for the quieter ones or kids who wanted to take a break. But a few days before the party we realized there would be five babies age 6 months – 18 months who needed a little something to do as well. So I hopped on the computer and bought a small tent with balls for the little ones (thanks Amazon Prime shipping!) and put out some blankets with baby toys on the grass as well. Everyone was entertained and had fun.
Also, even though we catered Mexican food, we made sure there was fruit, hot dogs, and snacks for picky littles.

6. Most importantly, have fun!
Enjoy yourself, take photos, and don’t worry about the little things. At the end of the day, we forgot to put the juice boxes out for kids, the cacti balloons were blowing all over the place and had to be put away (and later flew away), and the piñata took forever to break. But the kids had a blast, the parents enjoyed themselves, and no one noticed the imperfections. Not even me.
I hope these tips will help you in your next party planning adventure! What are your favorite tips for planning a party without going insane in the process?
Stay tuned for a full party feature, complete with vendor and source links, coming soon!
#spon: I am in a partnership with Intel. Through this partnership I gain access to content, product, or other forms of value.


*this post contains affiliate links. if you click on the link and buy the product, I may make a small commission, which helps me continue to bring you lovely content here on Oh Lovely Day. Thanks for the support! You can also bypass these links if you prefer.
DIY Temporary Tattoos

I made DIY temporary tattoos for Charlie’s carnival themed 3rd birthday party at the Griffith Park Carousel a few months ago, and I finally shared the DIY over on Momtastic this week. I really loved how these turned out and they were a huge hit with the kiddos. We had a tattoo bar, plus personalized tattoos with the kids’ names in their favor bags. Big thanks to Lupa & Pepi for designing the amazing carnival tattoos for me! (more…)
Kid-Friendly Party Ideas to Celebrate the Olympics

Since the Olympics is wrapping up soon, I wanted to share this post I did for Momtastic where I rounded up some fun, kid-friendly ideas for throwing an Olympics party. Whether it is just to watch them with your family or to host a larger viewing party, there are creative and easy ways to get everyone in the Olympic spirit. See the full post here.
Check out my other posts for Momtastic as well:
Ways to Show Your Family Love Everyday (not just Valentine’s Day)
Pregnancy Proofing Your Skincare Routine
DIY Ikea Dresser Hack
You can find all of my posts on Momtastic here.
Photo from Hostess with the Mostess
A Vintage Circus First Birthday Party
 Happy Friday! Another Friday means another Lovely Ever After post. Today I’m sharing my son Charlie’s 1st Birthday party, because it had lots of fun DIY to share.
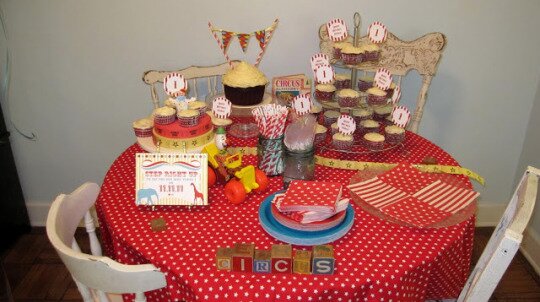
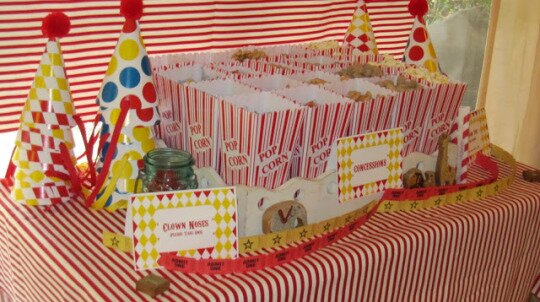
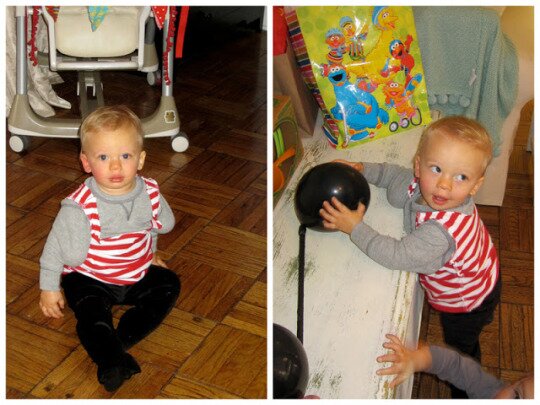
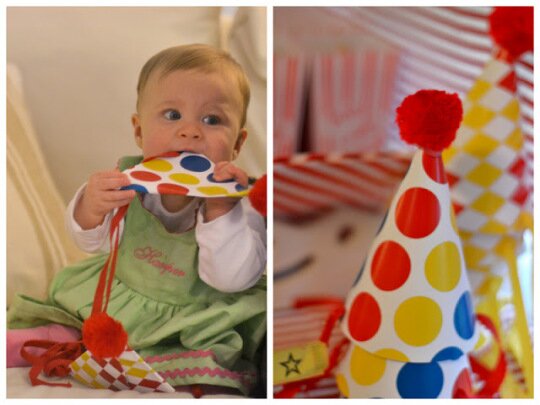
Charlie turned 1 on 11/11/11, and I wanted to somehow incorporate that into the party theme. So I went with vintage circus and included on the invites to “step right up to see the boy who turns 1 on 11/11/11.” Sort of a play on that old school circus freak idea… I mostly decorated with vintage toys that already decorated Charlie’s room. Costumes were optional, and I provided clown noses as favors so everyone could participate. Charlie was a strongman. His “muscles” were a little saggy (just rubber balls put under his shirt sleeves), which he wasn’t happy about. I also made his barbell in the photo on the right by using black duct tape to cover a dowel rod, and tape black balloons to each end. Super easy!
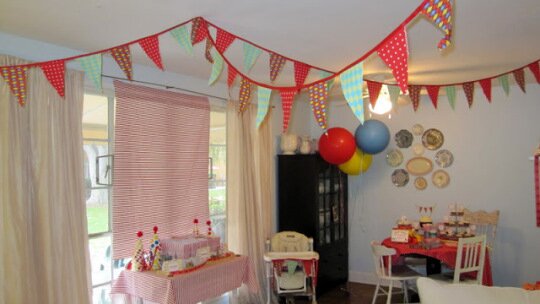
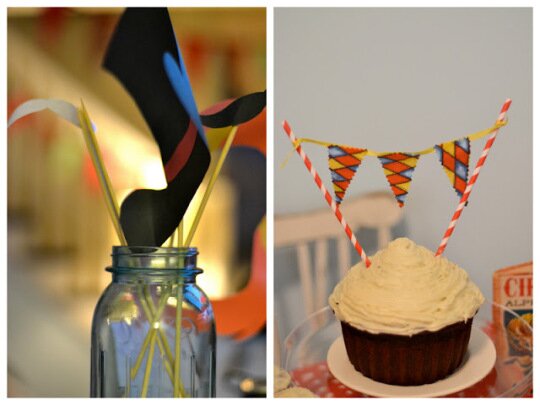
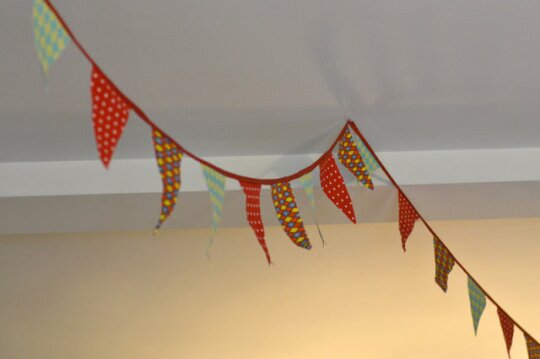 Keep in mind we live in an apartment in LA, so space was limited. It also rained (one of the three days a year it does in LA!) so we were mostly inside. But I think you can do a fun party in small spaces. I made the fabric bunting by collecting fabrics I liked for a couple months, and followed this tutorial. You can find triangle templates (and a slightly different version of this DIY) here. I used pinking shears to cut out my fabric triangles, iron on adhesive (just follow the directions on the adhesive), and red 5/8″ red grosgrain ribbon. I loved how it turned out, and to be honest, it stayed up until we decorated for Christmas!
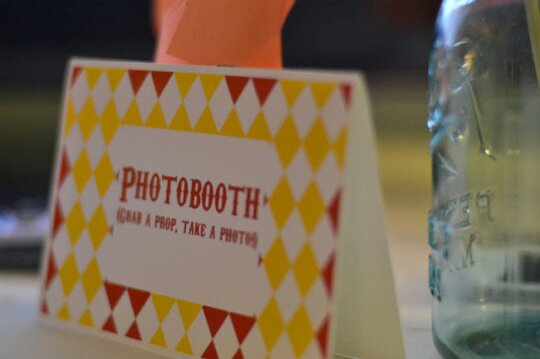
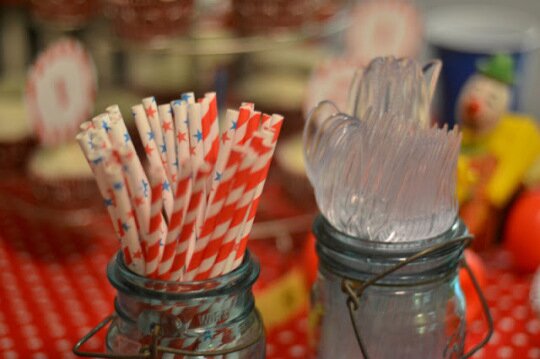
I also wanted to have a little photobooth, so I somehow convinced my husband to freestyle draw circus style props on construction paper, which I glued to skewers and put in a mason jar next to a sign and a camera. They would have been better if supported with some card stock, but this was a last minute project and were sort of “over” the DIY by this point. I got the cute straws, napkins, plates, extra big balloons, and cupcake liners from Shop Sweet Lulu and Hey YoYo. And I just put everything in my collection of mason jars. I made the signs and cupcake toppers myself, by using these digital papers, designing them in Photoshop, and printing them on cardstock. I then glued the cupcake toppers onto toothpicks.

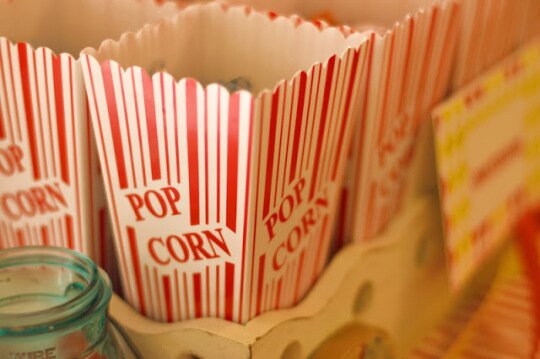 I found the plastic popcorn tubs in the Target $1 bin a couple of months before, and I put old school candy, unshelled peanuts, popcorn, animal crackers, and other circus concessions in them. We also served corn dogs and soft pretzels (a circus party has the easiest food to serve!), and bottles of soda and Izze in our party colors (which were super yum!). I also made a ring of fire, which was a big hit with the kiddos. I was inspired by Hello! Lucky and one of their son’s circus birthday party, and they provide a tutorial here. My husband drew & cut out the “fire” from yellow and orange felt and I glued it on to a small hula hoop.

 I loved Charlie’s birthday party invitations, which were custom designed by Samantha of Papermints. She now sells them in her etsy shop and you can find them here, along with what the front of it looked like. I bought matching envelopes and address labels at Paper Source, and printed more of those digital papers above onto regular paper and cut them into envelope liners. Here is a photo of the back of the invite, which I displayed on the cake/cupcake table.
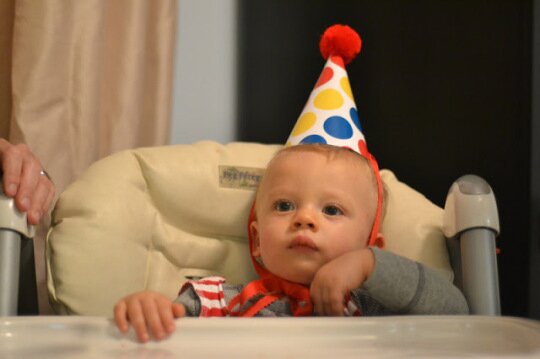
The last DIY to share were the party hats. And I’m going to warn you, they were a pain in the youknowwhat! They turned out cute, but I made one for every guest (kid and adult) and most didn’t get worn. In fact, I have about 20 of them perfectly intact. And they took a lot of time and work. If I did it over again I would only make a few, but they were cute and made for some cute photos. You can find the tutorial I used to make them on Oh Happy Day, along with a template. I only used it for the template and decorated mine differently. I also used a hole punch instead of an exacto knife to put the ribbon in to tie them on. Again, I used the digital papers I linked to above and printed them on card stock.
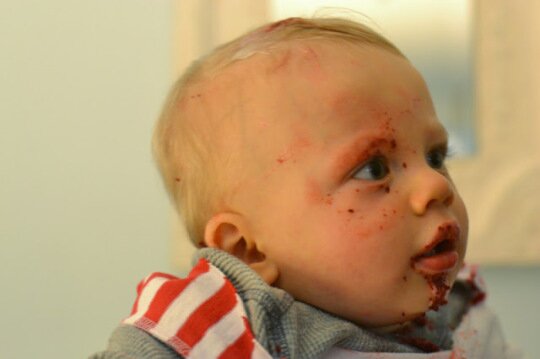
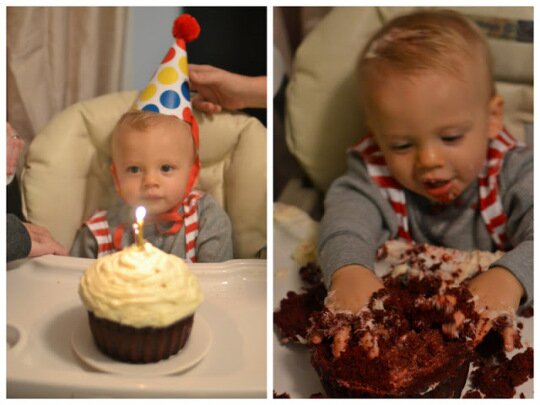 I also baked Charlie’s giant cupcake birthday cake (using this pan, in case you are interested). Biggest lesson learned: red velvet was a HUGE mistake. Charlie looked like he lost a fight with a circus animal. And I was cleaning up red cake from my floor, rug, bathtub, etc. for days!
 But all in all a great time was had by all and the party was a success! If I could offer any advice to you mommas who are getting super excited to plan their baby’s first birthday, it would be this: don’t over DIY! Pick a couple of projects, or just one if you aren’t really a DIY’er. I did a little too much, got a bit stressed about finishing them, and in the end scrapped making caramel apples and circus cut-out sugar cookies. But I didn’t need to make my own party hats or bunting — you can easily buy those and save yourself the trouble. I was also still dealing with postpartum depression (that’s another post) and I think I was trying to compensate for that but didn’t do myself any favors by adding to my stress. Remember that the day is about celebrating how you survived that delivery a year ago and what a hard and fun time that first year was, and how your baby is already 1 year old! Everything else will fall into place and everyone will have fun, even you!
*all photos by sosmithy design and property of Oh Lovely Day. This post contains affiliate links.